

The Swiftchat platform for end users is created like a super-app – a store of chatbots. It is available as:
Both the above applications are identical in their functionality and user interface, providing the users with a seamless experience irrespective of the type of device they are on.
The end users that use the chatbots are introduced to multiple chatbots through a discover screen when they enter any version of the app. They can see various chatbots and can click on any of them to start interacting.
Any user who comes on to the Swiftchat app (Android or PWA) must log in using a valid phone number before they can access the app. In the steps below, we outline the user journey to access a bot on the Android and PWA apps.
Logging in to SwiftChat app as a first-time user
Credentials
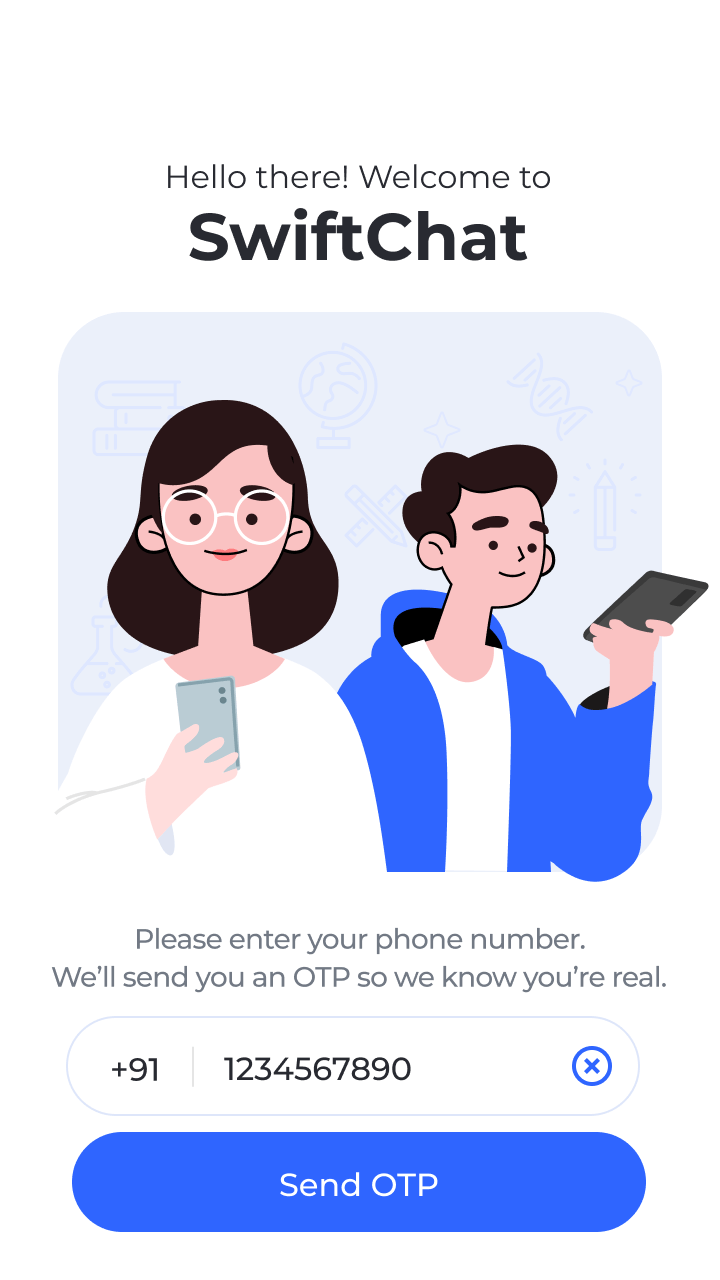
Logging into the SwiftChat platform as a first-time user requires only a valid 10-digit phone number registered in India. The user is required to go through a 2-step OTP verification process.
Onboarding
Step 1: First-time users are prompted to enter their phone number and click on ‘Send OTP’.
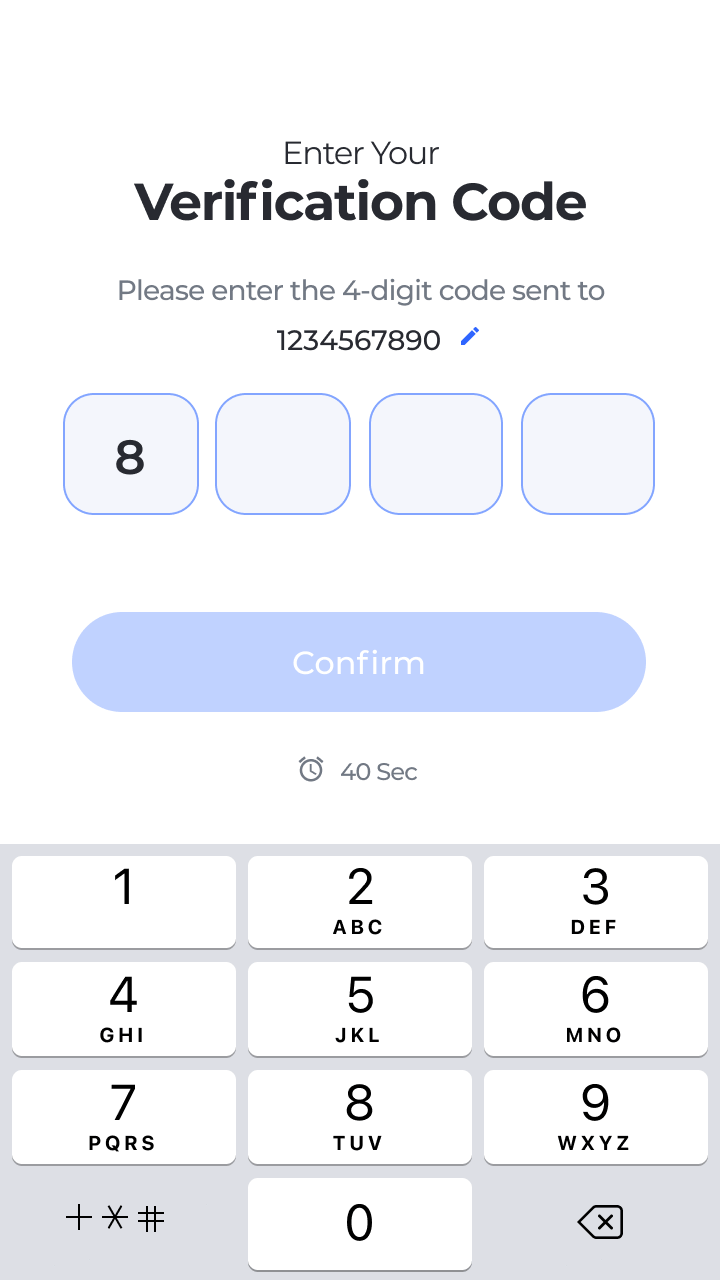
Step 2: Users are then shown a prompt to input the OTP, with a timer of 60 seconds.
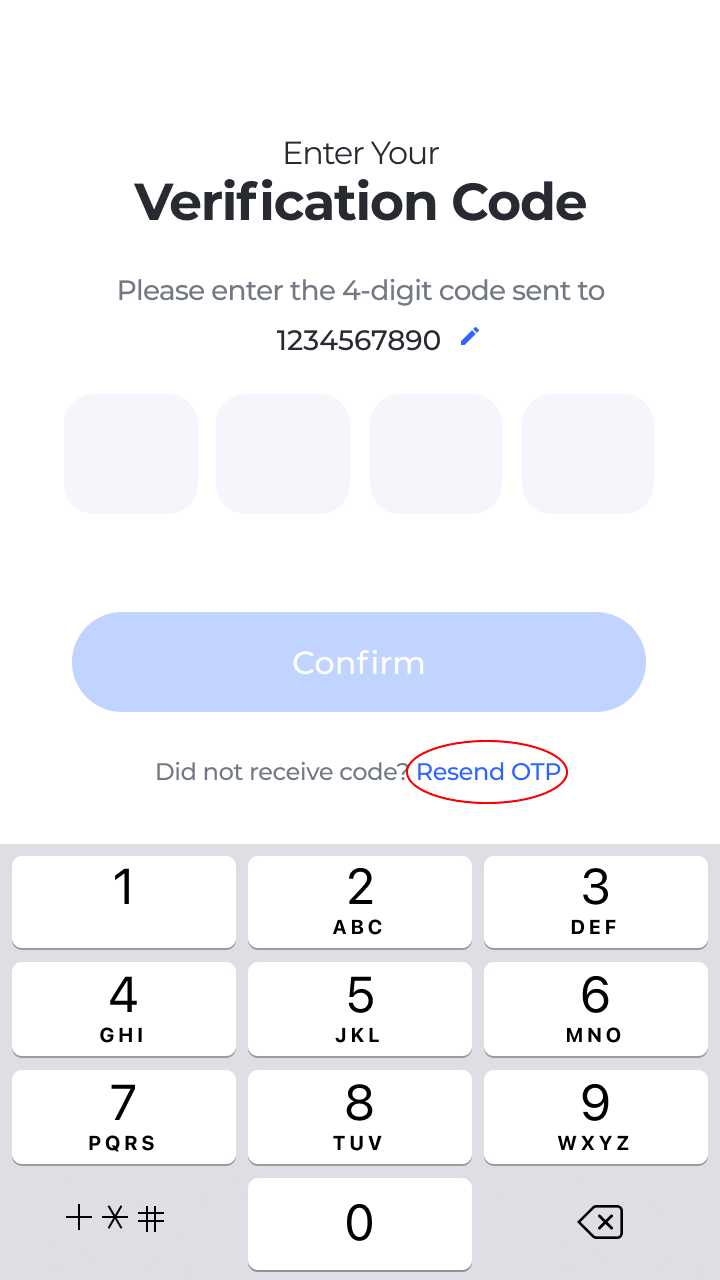
Step 3: If the user has still not received the OTP when the 60-second timer ends, the user is shown an option to ‘Resend the OTP’. Alternatively, they can edit their phone number if they had mistakenly entered the incorrect phone number, or add a new phone number to receive the OTP on a different number.

‘Edit phone number’ option
If the user chooses the ‘Resend OTP’ option, users are sent the OTP again to the same mobile number and the 60-second timer begins again.
If the user chooses the ‘Edit phone number’ option by clicking on the pencil icon, users are sent back to the screen where they enter their mobile number. But to ensure that the user wants to change the number and avoid re-entering the same number, the user is shown a message to wait for OTP or confirm that they want to change their number.

Confirmation screen for ‘Edit phone number’
Successful Login
After successfully logging into the application, the first time user might see no bots in the Chat section. They can navigate to the Discover section to find and start interacting with chatbots.
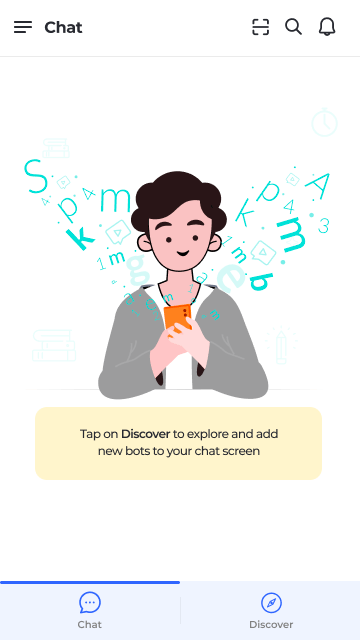
‘Chat’ section of a new user on the SwiftChat platform
SwiftChat, in its current release, has 2 major sections on the app (Android and PWA): Chat and Discover. Apart from these two sections, the apps also have a QR code scanner and a hamburger menu.
The QR code scanner allows users to scan QR codes of bots to access them directly. The QR Code scanner is the first option on the top right corner of the screen in the app.
The hamburger menu is where the user can access their profile, such as their phone number, help, and platform settings such as text size and log out.
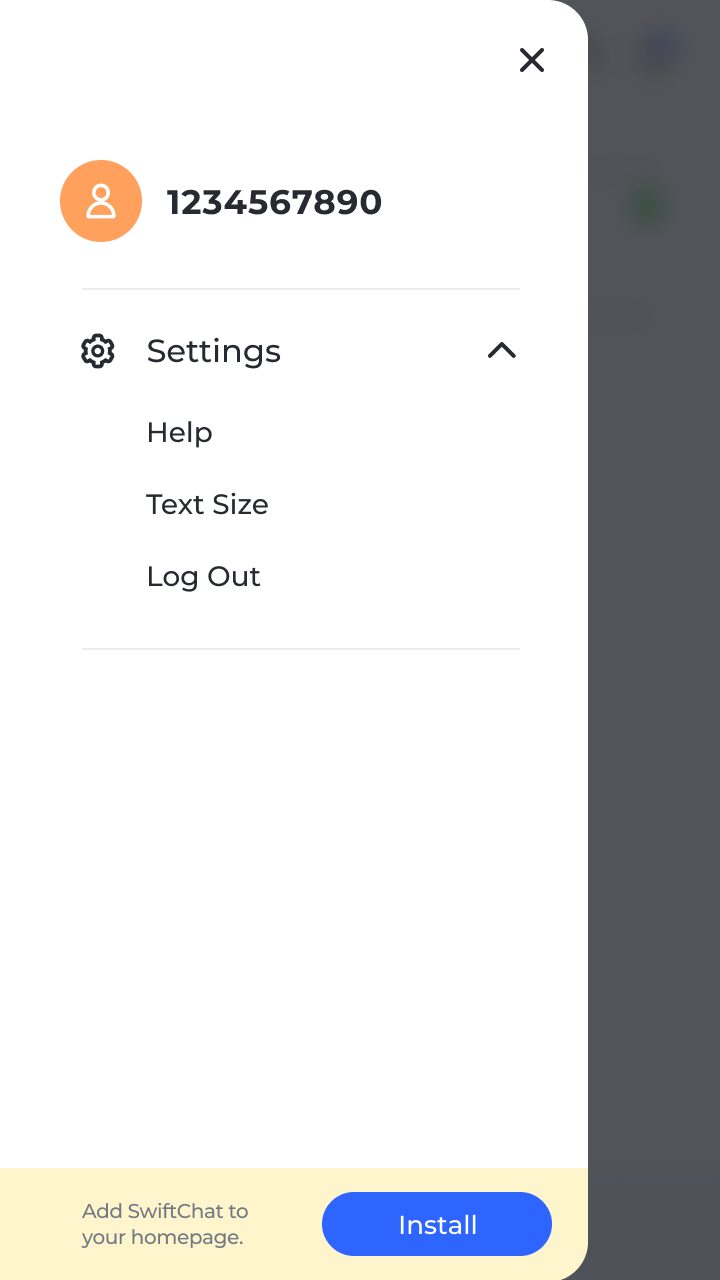
‘Hamburger menu’ section of the SwiftChat platform
Chat section
The Chat section is the default homepage. This is where any user lands upon completing their mobile verification process. The Chat section is where all the subscribed chatbots of a user are seen.
All SwiftChat platform users are subscribed to the Team SwiftChat bot, which is a sticky bot at the top of the Chat section. Apart from the Team SwiftChat bot, all bots must be subscribed to by the user. No new bot can message a user unless first subscribed to by the user.
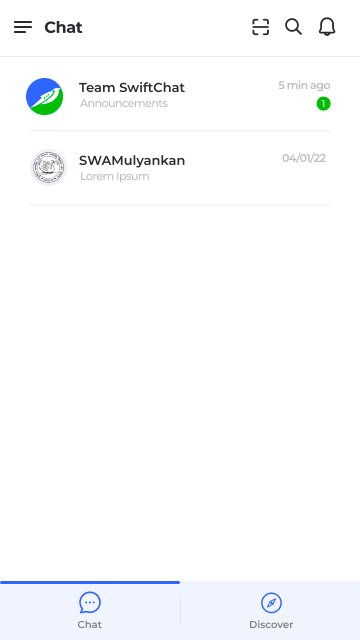
‘Chat’ section of the SwiftChat platform
In the Chat section, users can see the chats they have with their subscribed bots. Like any conversation, every interaction with a bot can be exited and resumed at any time by the user.
Discover section
The Discover section is where a user can explore and search the SwiftChat platform for new and exciting chatbots. This section also shows users the banners for new recommended bots to the user in a carousel at the top of the page. Users can click on a banner to enter a new bot directly.
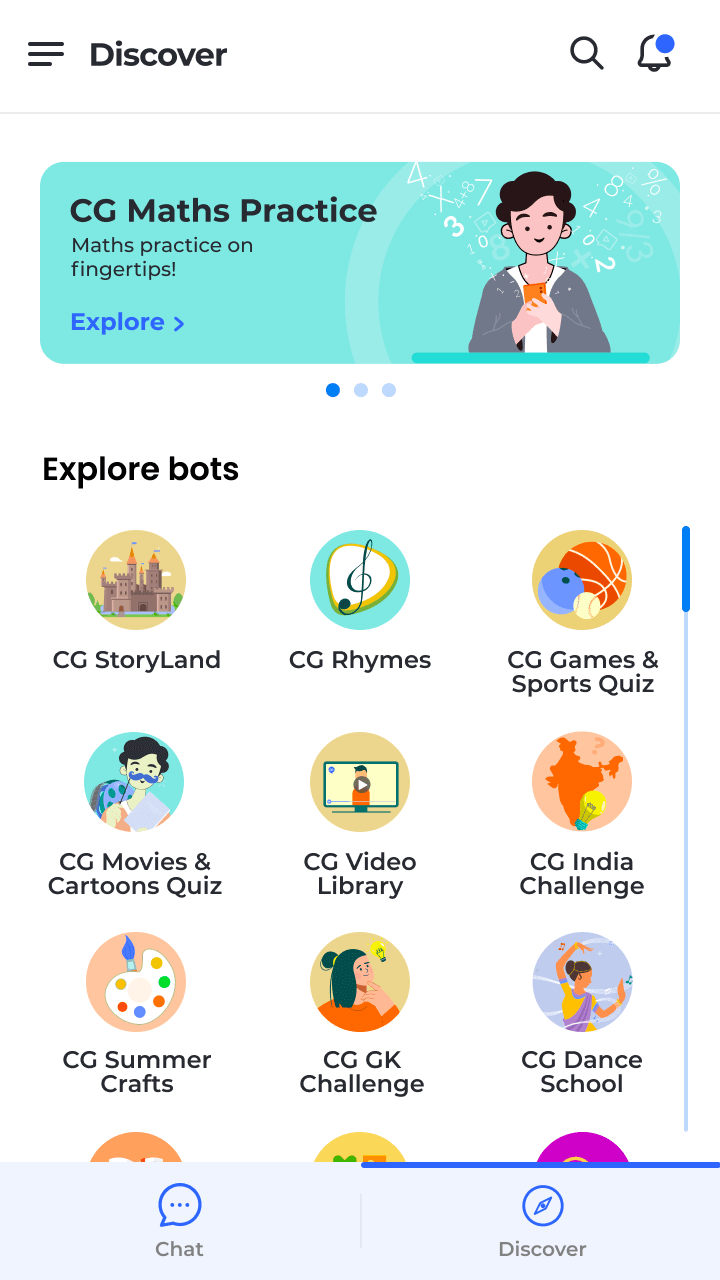
‘Discover’ section of the SwiftChat platform
Inside a Chatbot
When a user clicks on a banner or a bot from the list of bots shown, they are taken to that bot’s welcome banner. The welcome banner shows the user a few details about the functioning of a bot.
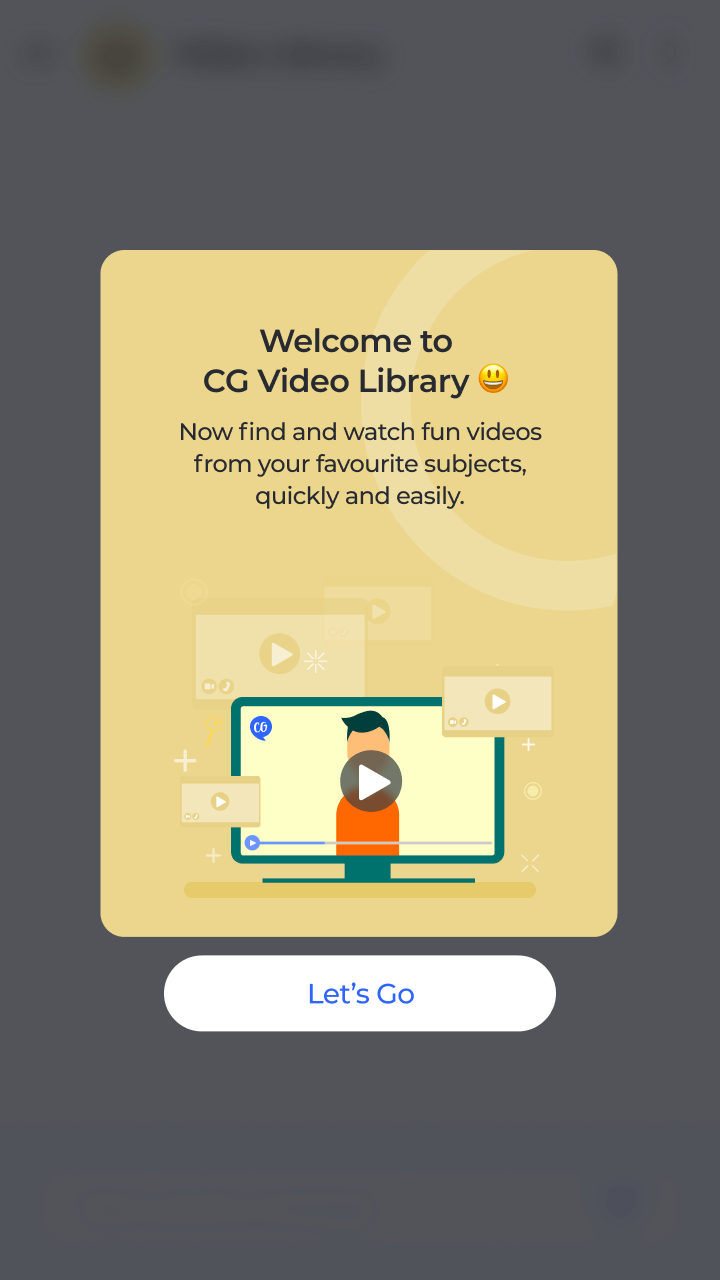
The ‘Welcome Banner’ for a bot
Users can enter the bot’s conversational window by clicking on the “Let’s Go” button. They may then subscribe to the bot by sending a ‘Hi’ to the bot.
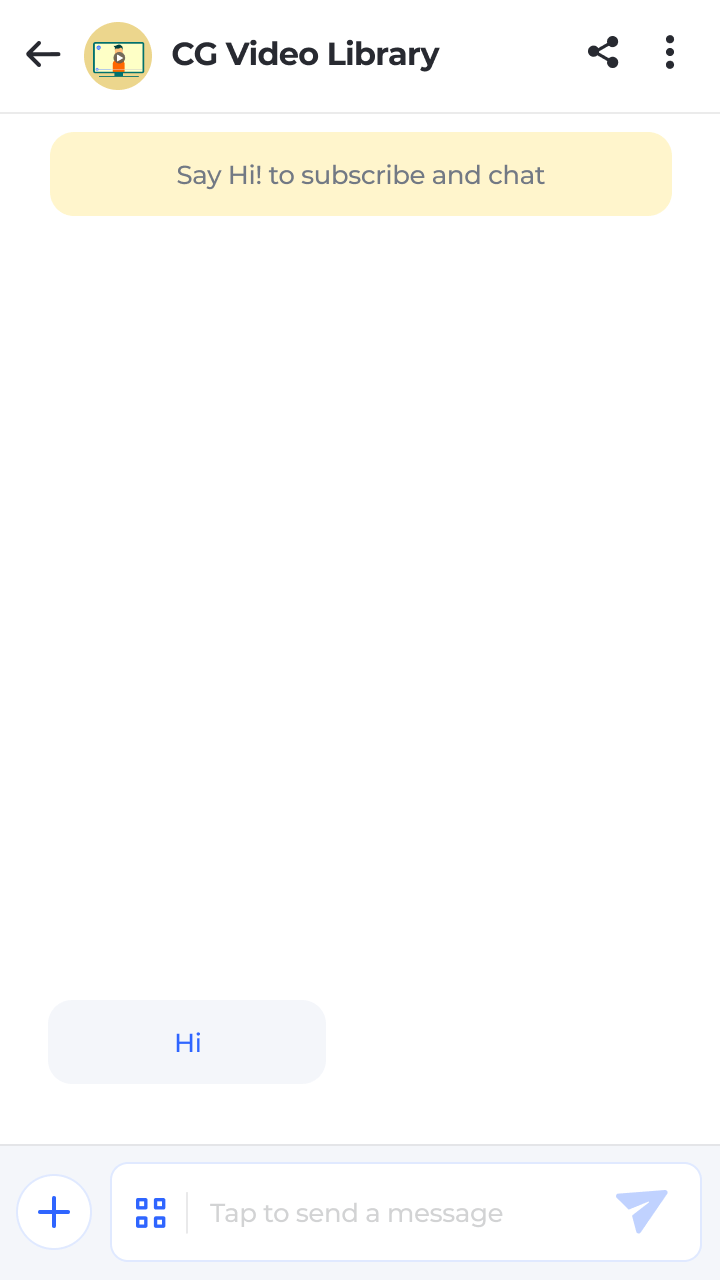
Bot conversational window
When users are on the bot conversational window, they can view the bot information by clicking on the bot icon or name. The bot info page has details about the bot, the bot’s unique QR code, the bot’s share link, and the bot rating.
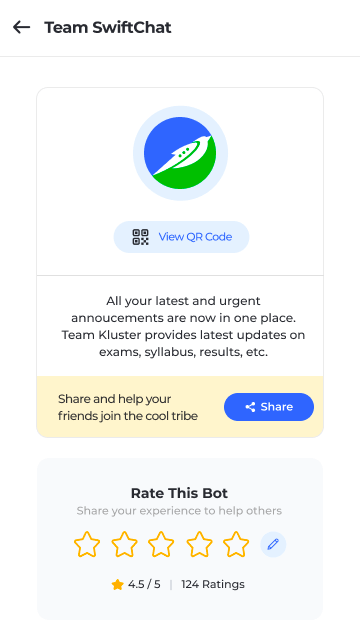
Bot info page of the Team SwiftChat bot
They can also share the bot link with their friends on other platforms using the share button on the top right of the conversational window or from the bot info page. They can also share the QR code of the bot with a friend or their class by clicking on the “View QR code” button.
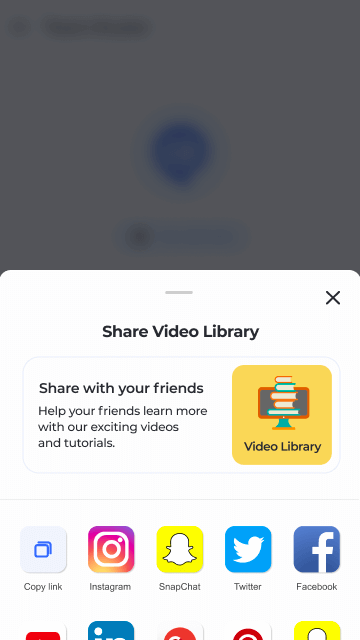
Share options for a bot
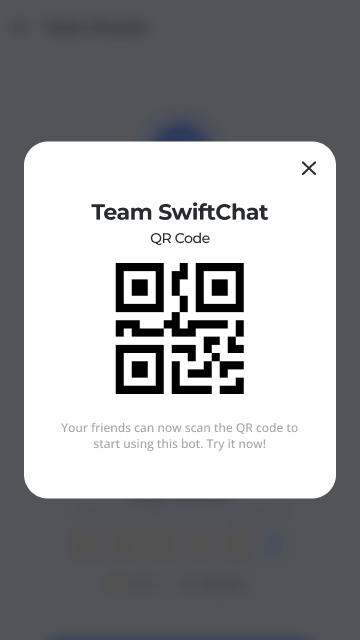
Each bot has a unique QR code which can be used to access it